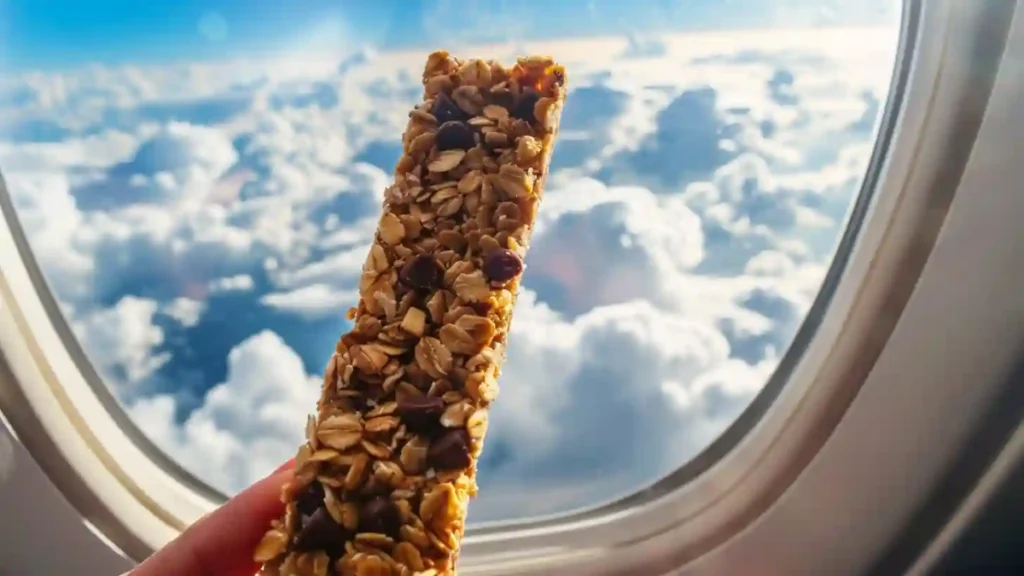
Yes, you can bring granola bars on a plane. They’re one of the easiest and most reliable snacks to pack for air travel. Lightweight, compact, and satisfying, they tick nearly every box for smart in-flight snacking.
In this guide, we’ll cover everything you need to know. You’ll get a quick breakdown of TSA rules, a curated list of the five best store-bought bars that won’t crumble in your bag, and a simple homemade recipe built specifically for travel. Whether you’re packing for a short hop or a long-haul flight, this article is your go-to resource for airplane-friendly granola bars.
Can You Bring Granola Bars on a Plane? The Official TSA Rules
The Short Answer: Yes (with Context)
Granola bars are allowed by TSA in both carry-on and checked bags because they are solid foods. They are not subject to the 3-1-1 liquids rule unless they are spreadable or semi-liquid.
Are Granola Bars a Solid or a Liquid?
Granola bars are solid. That means they are not subject to the TSA 3-1-1 liquid rule, which applies to items like sauces, spreads, and gels. While a jar of peanut butter would be restricted, a peanut butter granola bar is not. This difference is key and eliminates most confusion at airport checkpoints.
The E-E-A-T Win: Linking to Official Sources
For full clarity, the TSA officially allows solid snacks like granola bars through security. You can check their exact wording on the TSA’s What Can I Bring? Linking to this source gives you verified, up-to-date information from the agency itself.
A Note on International Flights and Customs
While TSA rules cover flights within or from the United States, some countries have different restrictions. Items containing nuts, seeds, or fresh ingredients might be flagged by customs abroad. To stay safe, eat your bars in-flight or check your destination’s food import rules in advance.
What Makes the Perfect Granola Bar for Air Travel? The 5-Point Criteria
Not all granola bars are travel-friendly. Some crumble too easily, others melt in your bag, and a few can even trigger allergy concerns in tight airplane cabins. To pick or make the ideal bar for your flight, it should meet five key travel criteria.
1. Low-Mess and No-Crumble
A granola bar that falls apart in your hands is the last thing you want at 30,000 feet. Crumbs in your lap, sticky fingers, and a messy seat tray are distractions you don’t need. The best bars hold their shape without breaking into pieces.
2. Allergen-Conscious with Nut-Free Options
Many flights are peanut-free zones due to allergy risks. A bar that contains no nuts or is made in a nut-free facility is a safer choice for shared spaces like airplane cabins. This is especially important for parents, school groups, or those with sensitivities nearby.
3. High-Satiety with Protein and Fiber
A good travel snack should actually fill you up. Bars rich in protein and fiber keep hunger at bay during long flights. This helps avoid unnecessary in-flight purchases or mood dips from skipped meals.
4. Shelf-Stable and No-Melt
Avoid bars coated in chocolate or yogurt that can melt during travel. Choose options that stay firm in warm bags or overhead compartments. Stability in different temperatures is key.
5. Packable and Durable
Dense, compact bars travel better than light and airy ones. They are less likely to get crushed and can handle bumps and movement in your backpack or carry-on. A well-packed bar means less mess and less stress.
The 5 Best Store-Bought Granola Bars for Air Travel
Choosing the right granola bar for a flight can make all the difference. These picks are travel-tested, mess-free, and meet the key criteria for in-flight snacking. Below is a quick comparison to help you choose the best one for your trip.

One of the best Overall for Low-Mess and High-Satiety
RXBAR stands out for its solid texture and high protein content. It holds up well in a backpack and keeps you full during long flights. The minimal ingredient list also appeals to clean eaters.
Best Certified Nut-Free for Air Travel
MadeGood Bars are school-safe and allergy-friendly. Each bar is free from peanuts, tree nuts, and other common allergens. They are soft, compact, and ideal for anyone needing a worry-free snack on board.
The best High-Protein Option for Long-Haul Flights
Clif Builder Bars offer 20 grams of protein, making them ideal for long journeys. These bars provide sustained energy and help curb hunger through multiple flight legs. Look for flavors without a chocolate coating to avoid melting.
Best Healthy and Low-Sugar Option
Larabar keeps it simple with just a few ingredients. Some flavors are naturally nut-free, so check labels carefully. These bars offer natural sweetness with no added sugar, perfect for mindful eaters.
Best No-Crumble Classic Bar
Nature Valley Chewy Bars have a soft texture that stays together better than the crunchy version. They pack easily, create minimal mess, and are widely available in travel-friendly multi-packs.
How to Make Your Own Travel-Proof Granola Bars
Making your own granola bars gives you full control over ingredients and texture. This recipe is built for travel. It holds together, packs easily, and meets all five criteria from earlier.
Why This Recipe is Built for Travel
This bar stays firm without crumbling, offers a good amount of protein, and can be made nut-free by swapping ingredients. It’s free from chocolate or yogurt coatings, which makes it less likely to melt. It’s also designed to be dense and compact, making it perfect for tossing in a carry-on without worrying about a mess.

Ingredients Needed
– For the Base
- Two and a half cups of rolled Oats (Old Fashioned) – Do not use instant oats as they will make the bar too mushy, and steel-cut oats will be too hard.
- Three tablespoons of pepitas or finely chopped sunflower seeds
- One third cup of mini chocolate chips
– For the Binder
- One cup of smooth natural peanut butter or seed butter
- Two thirds cup of honey
- One teaspoon of vanilla extract
- A heaping half teaspoon of sea salt
– You’ll also need
- An 8 by 8 inch baking pan
- Parchment paper for lining and pressing
These ingredients work together to create a bar that holds its shape without being too hard or too sticky. You can swap the peanut butter for sunflower seed butter to make it nut-free.
How to Make Travel-Proof Granola Bars
Follow these clear steps to create bars that stay firm, taste great, and travel well.
- Prepare your pan
Line an 8 by 8 inch baking pan with parchment paper. Let a bit of paper hang over the edges so you can lift the bars out easily later.

- Mix the wet ingredients
In a large bowl, stir together the peanut butter, honey, vanilla extract, and salt. Keep mixing until the texture is smooth and consistent. This mix is your binder and needs to be fully blended for the bars to hold.
- Add dry ingredients
Pour in the rolled oats, pepitas or seeds, and mini chocolate chips. Stir slowly at first. It might seem too dry, but keep folding the mixture until everything is coated evenly. Use a firm spoon to press and turn as needed.
- Press the mixture firmly into the pan
Transfer the mixture into the lined baking pan. Press it down with a spoon or spatula, then place another sheet of parchment paper on top. Use the bottom of a flat glass or measuring cup to press down as firmly as possible. Compaction is key to avoiding crumbly bars


- Chill and set
Place the pan in the fridge for at least one hour. This step allows the bars to firm up. The longer they chill, the better they hold their shape.
- Slice and store
Once chilled, lift the entire block out using the parchment edges. Use a sharp knife to cut into evenly sized bars. Store them in a container in the fridge for up to one week.
The Secret to No-Crumble Bars
There are three things that make these bars stay intact. First, use a sticky binder like honey or brown rice syrup. Second, press the mix into the pan as tightly as possible. Third, do not rush the chill time. The full hour in the fridge is not optional if you want clean, sliceable bars.
How to Pack Your Homemade Bars for a Flight
Wrap each bar individually in parchment paper. Then place them in a sturdy, hard-sided container. Avoid soft plastic bags, which can lead to crushed bars. This method keeps your snack safe and mess-free throughout the flight.

Expert Troubleshooting: Why Your Travel Snacks Failed (and How to Fix Them)
Homemade granola bars can go wrong for a few common reasons. Here’s how to solve each issue before your next trip.
Problem: My Homemade Bars Fell Apart in My Bag
This is the number one issue people face, and it usually starts during preparation.
Fix it with these tips
You didn’t press the mixture hard enough into the pan. Use the back of a flat-bottomed cup or a small bowl to compact the mixture tightly.
You cut the chill time short. Bars need at least one full hour in the fridge to set properly.
You used the wrong binder. Peanut butter that’s too thick or dry won’t hold. Also, maple syrup is not sticky enough to do the job. Stick with honey or date paste.
Problem: My Bars Turned Out Hard as a Rock
This often happens when heating ingredients for certain recipes.
Fix it with these tips
If your recipe calls for heating honey or sugar, make sure not to overdo it. Boiling it too long turns the binder into hard candy. Two minutes is often enough to activate stickiness without making the bars brittle.
Problem: My Bars Got Sticky and Melted
This is usually a storage and ingredient problem.
Fix it with these tips
Avoid ingredients like butter or coconut oil that soften too much at room temperature. Skip chocolate or yogurt coatings, which melt in warm bags.
Wrap the bars in parchment paper and store them in a firm container. Keep them in the coolest part of your carry-on to avoid softening.
Problem: A TSA Agent Questioned My Homemade Bars
Rare, but it can happen if your bars look moist or spreadable.
Fix it with these tips
Keep the bars in a firm, clearly defined shape. If asked, explain they are solid homemade granola bars. Be polite and calm. Most agents will have no problem once they understand what it is.
Serving and Storage Tips
Once your travel-proof granola bars are ready, the way you serve and store them makes a big difference in how well they hold up during travel.
Pro Tip
Freeze your bars the night before your flight. They will act as mini ice packs in your snack bag and will be perfectly thawed and firm by the time you reach cruising altitude.
Serving Suggestions
Cut bars into equal portions for consistent size and easy packing. For a cleaner experience in-flight, wrap each bar individually in parchment paper or foil. If you’re serving them at home before a trip, add a small napkin or paper towel to keep things tidy.
Storage Tips
Store the bars in an airtight container in the fridge to maintain freshness and texture. If you’re preparing them ahead for a trip, they’ll stay fresh for up to one week chilled. For flights, transfer the wrapped bars into a hard-sided food container to protect them from getting crushed inside your bag. Avoid placing them near heat sources or in outside pockets where they may soften or become sticky.
Helpful Notes
Here are a few extra tips to help you get the best results from your homemade granola bars.
Ingredient Swaps
If you need a nut-free option, use sunflower seed butter or pumpkin seed butter. These still give you the same stickiness and richness without the risk of allergens.
Add-ins
You can mix in dried fruit like cranberries, raisins, or chopped apricots for extra flavor. Just keep the total amount of add-ins low so the bars don’t lose structure.
For Extra Protein
Add a scoop of your favorite protein powder. Choose unflavored or vanilla to keep the taste balanced. If the mixture feels dry after adding powder, increase the honey slightly to help bind it.
Texture Adjustments
If you like softer bars, reduce the oats slightly. For firmer bars, use quick oats instead of rolled oats. Pressing the mixture firmly and chilling fully will also give the bars more structure.
Portion Control Tip
Use a ruler or small square cutter to slice the bars evenly. This helps with meal prep and makes packing easier for travel.
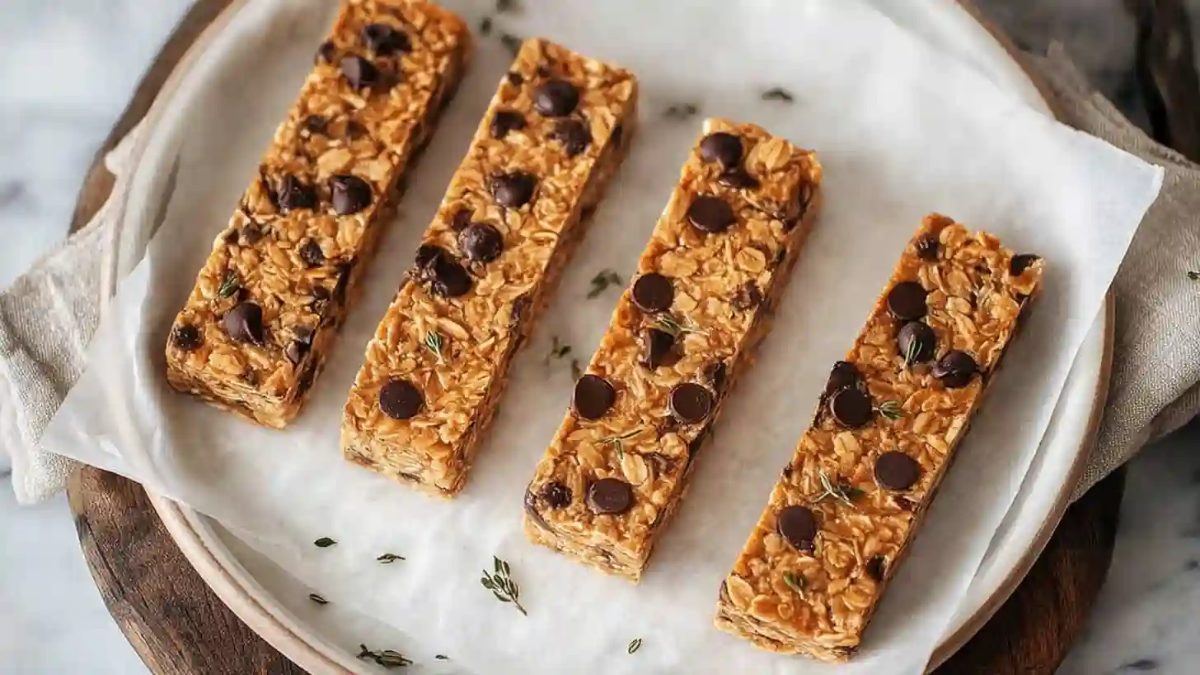
No-Crumble Travel-Proof Granola Bars
Ingredients
Method
- Line an 8 by 8 inch baking pan with parchment paper. Let the paper hang over the sides to make lifting easy.
- In a large bowl, mix peanut butter (or seed butter), honey, vanilla, and salt until smooth and well combined.
- Add the oats, pepitas/seeds, and chocolate chips. Mix thoroughly until evenly coated. Use a sturdy spoon to fold and press.
- Transfer the mixture into the prepared pan. Press down firmly with a spatula or use parchment and the base of a glass to compress tightly.
- Chill in the fridge for at least one hour to set completely.
- Once chilled, lift out of the pan and cut into 12 equal bars. Wrap individually and store in the fridge for up to one week.
Notes
- Calories: 210
- Fat: 10g
- Carbohydrates: 25g
- Protein: 6g
- Fiber: 3g
- Sugar: 12g
- Sodium: 80mg
Conclusion
Granola bars are one of the smartest and easiest snacks to bring on a plane. They’re allowed by TSA, they pack easily, and they offer a clean, satisfying bite without the mess. Whether you choose a store-bought option or make your own with the travel-proof recipe above, you’ll have a snack that fits perfectly into your carry-on routine.
The recipe shared here is built for travel. It stays firm, avoids common allergens if needed, and can be tailored to your taste. With just a few simple ingredients and the right storage method, you can avoid the crumbly, sticky messes that ruin most homemade bars.
If you tried this recipe, let us know how it turned out. Leave a star rating and a comment with any tweaks or tips you discovered. Did you pack them for a short flight or a long haul? Share your experience and help others get the perfect airplane snack too.
And if this helped you, feel free to share it on Pinterest or Facebook. Safe travels and happy snacking.
Leave a Reply
You must be logged in to post a comment.