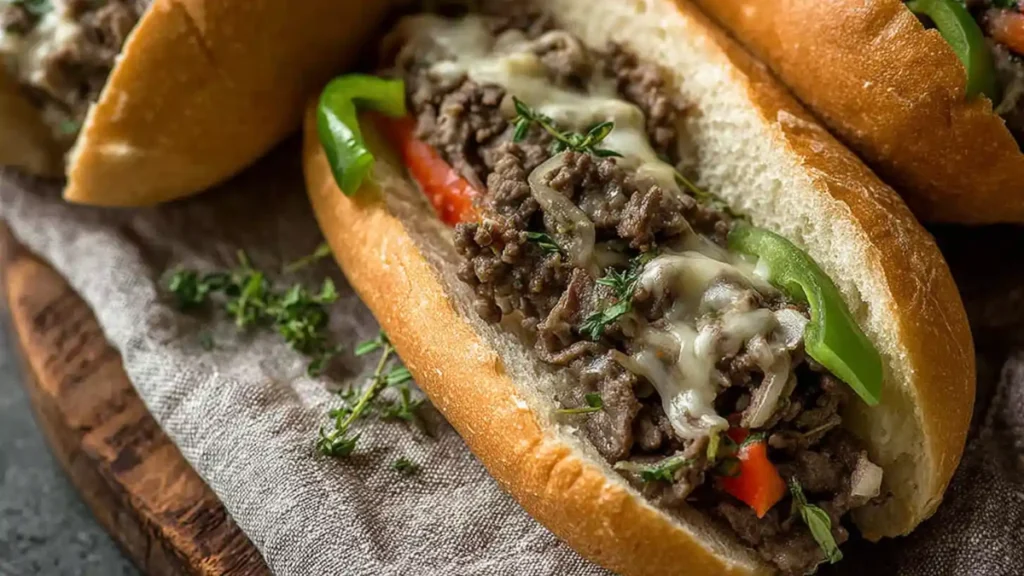
A Philly Cheesesteak Recipe for camping hits the sweet spot between comfort food and campfire cooking. It brings the rich flavor of seared steak, melty cheese, and toasted bread to the wild, with a smoky twist that only an open flame can provide.
But let’s be honest. Camping meals often miss the mark. The bread gets soggy. The meat spoils in the cooler. And cleanup turns into a chore when all you want is to relax.
This isn’t just a recipe. It’s a practical guide to prepping, packing, and cooking a real Philly Cheesesteak in the woods without sacrificing flavor, safety, or your sanity.
The Prep Ahead Protocol
This part happens at home so your campsite cooking is smooth, safe, and fast.
The Meat Selection
Choose Ribeye for the best mix of fat and flavor. It stays juicy when cooked over strong heat. If you want a cheaper option, Sirloin holds up well and does not dry out as fast.
The Freeze Slice Seal Technique
Place the steak in the freezer for about thirty minutes. This firms it just enough so you can shave it into very thin pieces with a steady hand. Thin slices cook quickly and stay tender.
Season the meat, then move it into a vacuum seal bag or a heavy zipper bag with all air pressed out. This protects the meat in the cooler and keeps your pack clean.
Vacuum Sealing for Safe Packing
A flat sealed bag chills faster in a cooler and stays cold longer. It also keeps juices from leaking into the ice or other food. This step is key for safe transport.
Veggie Prep
Slice onions and peppers at home. Store them in a separate container so they stay crisp. Keeping them apart from the meat helps the meat hold its color and texture during travel.

Cooler Packing and Food Safety
Packing your cooler the right way keeps your ingredients safe and your meal fresh. Cold control is everything when dealing with raw meat outside your kitchen.
The Layering Rule
Put your vacuum sealed meat at the very bottom of the cooler. This is the coldest spot. Place your sliced vegetables and other ready-to-eat items on top. Keeping raw meat at the bottom prevents leaks and cross-contamination.
Ice Block vs Cubes
Use ice blocks instead of cubes. Blocks melt slower and keep the internal temperature low for much longer. If you must use cubes, add them on top to fill gaps, but never depend on them alone to keep raw steak cold for more than a day.
Keep Bread Out
Bread does not belong in the cooler. Store hoagie rolls in a dry bin or inside your vehicle. Moisture from melting ice can ruin your rolls before you even unpack.
Choose Your Method (The 3 Ways)
Different camping setups call for different tools. Whether you’re using a skillet, foil, or a pie iron, you can still make a proper Philly Cheesesteaks in the wild.
Method A: The Cast Iron Skillet (Gourmet Style)
Best for:
Car camping, RV setups, or campers who want restaurant-level results.
Technique:
Place your Cast Iron skillet over white-hot coals. Avoid open flames since they can burn the food. Start by adding a tablespoon of oil and cooking your onions and peppers until they turn soft and golden. Move them aside or take them off the heat.
Add a bit more oil and toss in the shaved Ribeye. Spread it out so it sears instead of steams. It cooks fast so keep an eye on it. Once browned, return the veggies to the pan and stir everything together.
The Steam Dome:
Top the mixture with Provolone cheese. Quickly splash a small amount of water into the pan and cover it right away using a lid or foil. The trapped heat melts the cheese in seconds and blends it into the meat.
Method B: The Foil Pack (Zero Cleanup)
Best for:
Hikers, large groups, or anyone who wants fast results with minimal mess.
Technique:
Lay a large sheet of heavy-duty foil on a flat surface and spray it with cooking spray. Add a layer of onions and peppers first. This protects the meat from direct heat. Place the sliced steak on top.
The Vent Trick:
Fold the foil into a tight packet but leave a little space at the top. This pocket allows steam to move and cook the meat without making it soggy. Set the pack on hot coals for about fifteen minutes. Flip once halfway through. Open the foil carefully, add cheese, then loosely seal it again for another minute to melt.
Method C: The Pie Iron (Crispy Pockets)
Best for:
Kids, single servings, or anyone craving a golden toasted sandwich.
Technique:
Butter two slices of bread and place them butter side out into your pie iron. Add cheese slices on the inside to form a barrier. This keeps meat juices from soaking into the bread.
Spoon in the cooked steak and veggies. Close the pie iron and secure the latch. Set it on the coals for three to five minutes per side. Check often. When the outside is golden and crispy, it’s ready to eat.
The Assembly and the South Philly Finish
You made it this far. Now it’s time to build the sandwich right and solve the soggy bread problem for good.
Toast the Roll
Start by slicing your hoagie roll lengthwise, but don’t split it all the way through. Spread garlic butter on the inside. Place the roll face down on your Cast Iron skillet or camp grate. Toast it for about one minute until a golden crust forms. This crust holds up against the meat juices and keeps the sandwich from falling apart.
The Foil Wrap Rest
Once your roll is toasted and loaded with hot ribeye, onions, peppers, and melted Provolone, wrap the entire sandwich tightly in foil. Let it rest for two minutes before serving.
This quick pause softens the roll just enough to bite cleanly without tearing. It also allows the cheese to finish melting into the meat, making every bite feel like a proper sandwich shop experience by the fire.
Essential Gear Checklist
To cook a proper Philly Cheesesteak at camp, the right tools make all the difference. These items keep cooking smooth, safe, and mess-free.
Cast Iron Skillet or Pie Iron
For high heat searing or toasted pockets with crispy bread.Heavy Duty Foil
Thicker foil stands up to campfire heat and prevents tearing during flips.Long-handled Tongs
Keeps your hands safe while moving food around hot coals or grills.Instant-read Thermometer
Helps check if your meat is cooked through without guessing. Aim for 160 degrees Fahrenheit for beef.Heat-resistant Gloves
Protect your hands when handling hot cast iron or foil packs fresh off the fire.
Pack these in your camp kitchen tote so you’re always ready to make cheesesteaks with zero stress.
Ingredients Needed
Organized prep is key for camp cooking. Here is a clear breakdown of what you’ll need, grouped by purpose.
For the Filling
- Two and a half to three pounds of petite sirloin, thinly sliced
- One and a half teaspoons of seasoned salt, divided
- One teaspoon of garlic pepper, divided
For the Vegetables
- One sweet yellow onion, halved and sliced into thin strips
- One red bell pepper, thinly sliced
- One green bell pepper, thinly sliced
- Two tablespoons of vegetable oil for sautéing
For the Rolls
- Eight hoagie rolls, split but not fully separated
- Six tablespoons of softened butter
- Seven slices of Provolone cheese, about one ounce each
For Cooking
- Two more tablespoons of vegetable oil as needed for the skillet
This list covers every part of the meal. Pack each group in labeled containers to make cooking at camp simple and fast.
How to Make Campfire Philly Cheesesteaks
Follow these steps carefully to make sure everything cooks properly and tastes just right. This version is built for outdoor cooking but works just as well at home if needed.
1. Prep the Beef at Home
Place the sirloin in the freezer for about thirty minutes. This helps firm the meat so you can slice it as thin as possible. Thin slices cook faster and stay tender over high heat.

2. Cook the Vegetables
Add two tablespoons of vegetable oil to your Cast Iron Skillet. Set it over medium-low heat. Add the sliced onion, red pepper, and green pepper. Stir occasionally. Cook until soft and lightly browned. If they start to darken too quickly, move the pan to a cooler part of the fire or lower the heat. Once soft, remove the vegetables and set aside.

3. Slice and Season the Beef
After chilling, take the steak out of the freezer. Trim off any large chunks of fat. Slice the meat across the grain into very thin strips. Chop the slices into smaller pieces if needed. Season with half the seasoned salt and garlic pepper.
4. Cook the Beef in Batches
Add more oil to the skillet and increase the heat to medium-high. Add half the sliced steak. Cook for about four to five minutes, stirring often until no pink remains. Transfer to a plate. Repeat with the second batch and the remaining seasoning.
5. Toast the Rolls
Split each roll, leaving a hinge. Spread softened butter on the inside. Place them cut side down on your skillet or grate for about three minutes until golden and crisp. This step creates a barrier so the bread holds its shape when filled.
6. Melt the Cheese
Drain any extra liquid from the skillet. Return the cooked steak and vegetables to the pan. Spread everything into an even layer. Place the cheese slices over the top. Cover the pan with foil or a lid. Let it sit over low heat for about four minutes so the cheese melts fully.

7. Build the Sandwiches
Use tongs to pile the hot filling into each toasted roll. If possible, wrap each sandwich in foil and let it rest for two minutes. This helps the cheese settle into the meat and softens the roll just enough for easy eating.

Expert Troubleshooting: Saving Your Sandwich
Camp cooking rarely goes perfectly. Here’s how to fix the most common cheesesteak problems without panic.
Problem: My bread is a soggy mess
The Fix: Always build a barrier. Line the inside of your roll with a slice of Provolone before adding the hot meat. This prevents the juices from soaking in. Also, keep your bread out of the cooler. Store it in a dry tote or in the car to protect it from moisture.
Problem: The meat is tough and chewy
The Fix: You likely skipped the freeze and slice step or cut the steak too thick. At camp, if the meat feels too chewy, chop it up further while it cooks. Press down with your spatula to break up the fibers. This creates a chopped cheese texture that still tastes great.
Problem: Burnt outside, raw inside (Foil Packs)
The Fix: Your fire is too hot. Never put foil packs in direct flames. Place them on the edge of the fire over white coals. Also, always use Heavy Duty foil. Thin foil cannot handle direct heat and will burn through fast.
Problem: The cheese isn’t melting
The Fix: Wind and open air cool the top layer quickly. Trap the heat. Use a sheet of foil or an upside-down pan lid to cover the skillet. This holds in warmth long enough to melt the cheese into the meat fully. Leave it covered for at least one minute.
Serving and Storage Tips
Serving Suggestions
Serve cheesesteaks with simple camp sides like foil-wrapped corn, kettle chips, or a chilled pasta salad. Keep it easy so the sandwich stays the star. For drinks, cold root beer or lemonade pair well and keep cleanup minimal.
Add sliced pickles or pepperoncini on the side if your crew likes extra tang. For kids, try the Pie Iron method since the crispy bread and sealed edges are less messy.
Storage Tips
If you have leftovers, let them cool completely before packing. Store the meat and vegetables in an airtight container or resealable bag. Keep them in the coldest part of the cooler.
When reheating, use your skillet over medium heat. Add a splash of water to keep the meat from drying out and cover with foil to melt the cheese again. Avoid reheating in foil packs if the fire is too strong, or the meat will burn on the bottom. Always check that everything is heated through before serving.
Helpful Notes
Use what you have
If you don’t have Ribeye, Top Sirloin works well. Just make sure to slice it as thin as possible before leaving home. Thin cuts cook quickly and stay tender over campfire heat.
Try different cheeses
While Provolone is classic, you can also try White American, Mozzarella, or Cheddar. Just avoid aged or hard cheeses. They don’t melt as smoothly and can break the texture of the sandwich.
Don’t overfill the bread
It’s tempting to load the roll, but too much filling causes breakage. Use just enough to fill the roll comfortably. Press gently to close before wrapping in foil.
Pack extra foil and oil
Foil tears easily and you’ll need fresh pieces for reheating or building extra packs. Keep a backup bottle of oil for sautéing or to prevent food from sticking.
Keep a clean camp space
Bring paper towels, disposable gloves, and a trash bag to manage food safely. Clean tools right after cooking so nothing hardens or attracts animals overnight.
These small steps help make the whole experience smoother and your cheesesteaks even better.

3 Ways to Make Cheesesteak While Camping (No Soggy Bread!)
Ingredients
Method
- 1. Prep the Beef at Home: Freeze sirloin for 30 minutes for easy thin slicing. Thin cuts cook faster and stay tender.
- 2. Cook the Vegetables: Sauté onion and peppers in 2 tbsp oil over medium-low heat until soft and lightly browned. Set aside.
- 3. Slice and Season the Beef: Trim and slice beef into thin strips. Season with half the seasoned salt and garlic pepper.
- 4. Cook the Beef in Batches: Heat more oil in skillet. Cook beef in two batches, about 4–5 minutes each, stirring often.
- 5. Toast the Rolls: Butter each roll and toast cut side down on skillet until golden, about 3 minutes.
- 6. Melt the Cheese: Return beef and vegetables to skillet. Layer cheese on top. Cover and let sit over low heat until melted, about 4 minutes.
- 7. Build the Sandwiches: Fill each toasted roll with hot mixture. Wrap in foil and let rest 2 minutes before serving.
Notes
Nutrition Facts (Per Sandwich)
- Calories: 532 kcal
- Carbohydrates: 38 g
- Protein: 44 g
- Fat: 22 g
- Saturated Fat: 11 g
- Polyunsaturated Fat: 1 g
- Monounsaturated Fat: 6 g
- Trans Fat: 1 g
- Cholesterol: 126 mg
- Sodium: 916 mg
- Potassium: 694 mg
- Fiber: 2 g
- Sugar: 8 g
- Vitamin A: 1003 IU
- Vitamin C: 33 mg
- Calcium: 216 mg
Conclusion
The Philly Cheesesteak is more than a hot sandwich at camp. It brings comfort, rich flavor, and a little bit of city pride to the outdoors. When you pull a sizzling skillet off the fire filled with golden onions, tender steak, and melted cheese, the whole camp takes notice.
By using the Freeze Slice Seal method at home, you solve most of the hard parts before you even reach the site. You protect your cooler space, save time, and avoid the stress of slicing raw meat outside.
With three different ways to cook and simple tricks to stop soggy bread, this recipe puts real food within reach at any camp. Whether you’re grilling beside the car, hiking deep into the woods, or feeding a group around the fire, you now have a way to make your meals feel special.
Bring the right tools. Toast the roll. Watch the heat. The result is a cheesesteak that hits the mark every time.
Leave a Reply
You must be logged in to post a comment.