Gourmet Camping Breakfast Recipes: Skillet Hashes, Pancake Variations, and Morning Meals Worth Waking Up For
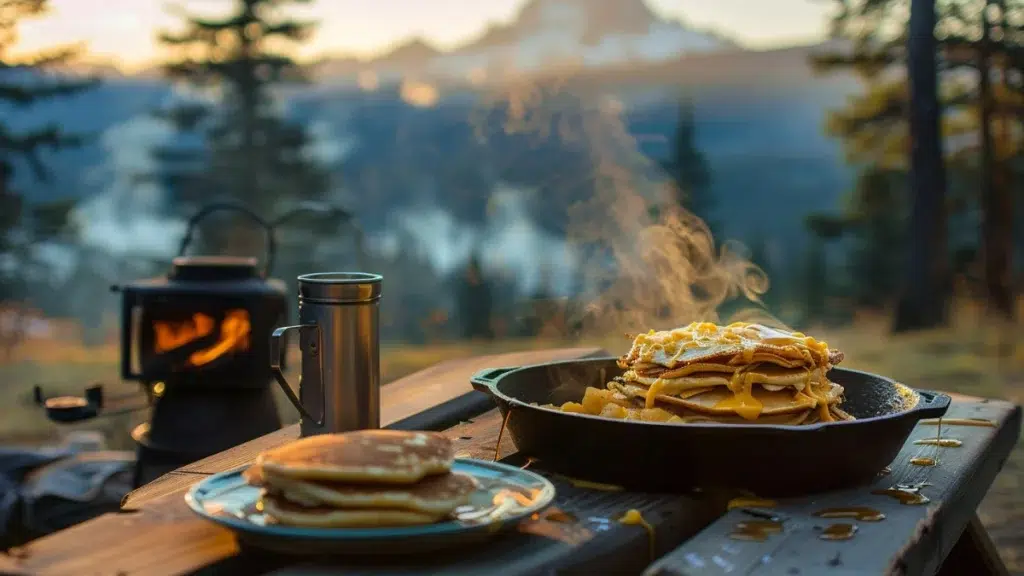
The morning I finally understood what camping breakfast could be, I was standing over my battered MSR WhisperLite at 6,400 feet in Oregon’s Three Sisters Wilderness, watching steam rise off a cast iron skillet while the sun crept over Broken Top. I had been camping for nearly a decade at that point, and I had eaten hundreds of uninspired camping breakfasts. Cold granola bars wolfed down while breaking camp. Instant oatmeal that tasted like sweetened cardboard. Scrambled eggs cooked directly in a pot because I was too lazy to bring a proper pan, resulting in a rubbery mess that even Luna, my ever-hungry border collie mix, approached with suspicion.
But that September morning was different. I had spent the previous winter obsessing over camping breakfast recipes, testing them in my home kitchen, then hauling the ingredients into the backcountry to see what actually worked when you are tired, cold, and operating on a tiny stove with questionable wind protection. The skillet hash I made that morning had crispy potatoes, perfectly cooked eggs, melted cheese, and a smoky depth from bacon I had pre-cooked at home. Marcus, my partner and perpetual gear critic, put down his coffee and said something he rarely says about my cooking experiments: “This is actually really good.”
That moment started a years-long obsession with elevating camp breakfasts beyond the bare minimum. In my seventeen years of regular camping, I have tested over 180 recipes, and a disproportionate number of those are breakfast recipes. There is something about that first meal of the day in the wilderness that sets the tone for everything that follows. Get it right, and you start your hike with energy and satisfaction. Get it wrong, and you spend the next four hours thinking about the diner breakfast you could be eating instead.
What I have learned through all that testing is that gourmet camping breakfasts are absolutely possible, but they require strategy. You cannot just take a restaurant recipe and expect it to work over a camp stove at elevation with limited equipment. The recipes I am sharing today have all been tested a minimum of five times across different conditions, elevations, and weather. Some of them took me years to perfect. A few of them came from spectacular failures that I would rather forget but that taught me crucial lessons.
Let me walk you through my favorite morning recipes, the stories behind how I developed them, and the specific techniques that make them work in real wilderness conditions.
Table Of Contents
- The Hash That Changed Everything
- Pancakes That Actually Work at Camp
- The Breakfast Burrito System
- Quick Oats Done Right
- The French Toast Recovery Story
- My Testing Process
- What I Have Learned About Morning Meals
- Frequently Asked Questions
- What is the best camp stove for cooking breakfast?
- How do I keep eggs from breaking during transport?
- Can I make these recipes over a campfire instead of a stove?
- How long will pre-cooked breakfast ingredients last in a cooler?
- What is the easiest camping breakfast for beginners?
- How do I adjust recipes for high altitude camping?
The Hash That Changed Everything
That first successful hash at Three Sisters was not an accident. It was the result of about eight failed attempts and one particularly memorable disaster at Crater Lake the previous spring where I tried to cook raw potatoes directly on a camp stove and ended up with something that was simultaneously burnt on the outside and crunchy-raw in the middle. Marcus ate his portion without complaint, which is how I knew it was truly terrible. He only stays silent when the food is beyond constructive criticism.
The breakthrough came when I started pre-cooking the potatoes at home. I know this sounds obvious now, but I had been stubbornly resistant to the idea of doing prep work before a trip. I thought the whole point of camp cooking was cooking at camp. What I did not understand was that preparation and actual cooking are two different things, and only one of them is pleasant to do while crouched on uneven ground in variable weather.
Here is how I make my go-to camping hash now, after refining it across maybe forty different camping trips over the past six years.
Before the trip, I par-cook about two pounds of Yukon Gold potatoes, cut into half-inch cubes. Yukon Golds work better than russets because they hold their shape after the initial cooking and do not turn to mush when you reheat them. I boil them for exactly seven minutes, which gets them about eighty percent cooked. They should still have a slight firmness when you pierce them with a fork. Then I drain them completely, toss them with two tablespoons of olive oil and a generous amount of salt and pepper, and spread them on a sheet pan to cool. Once they are room temperature, I transfer them to a gallon freezer bag, press out all the air, and freeze them flat. The flat freezing is crucial because the bag packs efficiently against other items in your cooler and the potatoes thaw evenly.
I also pre-cook the bacon at home. I lay strips on a sheet pan and bake them at 375 degrees for about twelve minutes, until they are cooked but not quite crispy. They will crisp up when you reheat them at camp. I let them cool, then store them in a separate freezer bag with paper towels to absorb any excess grease. The paper towels are important because otherwise you end up with a soggy, greasy mess that is unappetizing even when you are hungry from a night of sleeping on the ground.
For vegetables, I dice bell peppers and onions at home and store them together in yet another freezer bag. I have a color-coding system for my camping food bags: blue for breakfast ingredients, red for dinner, green for snacks. My camping partner Sarah thinks this is excessive, but I have never accidentally grabbed dinner ingredients when I meant to grab breakfast supplies, so the system works.
At camp, the actual cooking takes about twelve minutes of active time. I heat my 10-inch cast iron skillet over medium heat on my stove, which takes about three minutes to get properly hot. You want the pan hot enough that a drop of water sizzles and evaporates within two seconds. I add the pre-cooked bacon first and let it crisp up for about two minutes, then push it to one side of the pan. The bacon fat renders out and gives you a perfect cooking medium for everything else.
I add the potatoes to the hot bacon fat and spread them in a single layer, resisting the urge to stir them for a full four minutes. This is where most people go wrong with hash. They stir too much and end up with steamed potatoes instead of crispy ones. You want that bottom layer to develop a golden crust before you flip anything. After four minutes, I flip the potatoes in sections and let them cook another three minutes.
Then the vegetables go in. They only need about three minutes because you are not trying to cook them completely soft. You want some texture remaining. At this point, I make little wells in the hash and crack eggs directly into them. I use two eggs per person, which is about 140 calories of protein that really helps fuel a morning of hiking. I put a lid on the skillet, which I fashion from heavy-duty aluminum foil if I have not brought an actual lid, and let the eggs steam for about three minutes for runny yolks or five minutes for fully set yolks.
The final step is cheese. I bring pre-shredded sharp cheddar in a small container because shredding cheese at camp is annoying and block cheese does not melt as evenly. A generous handful goes on top during the last minute of cooking.
I have made this hash at sea level on the Oregon coast and at 11,200 feet in Colorado’s San Juan Mountains. The only adjustment I make for high altitude is adding about ninety seconds to the egg cooking time because water boils at a lower temperature up high, which affects how quickly things cook through steam.
The whole recipe serves two people generously and packs to about 1.4 pounds including all ingredients. When I am backpacking and need to watch weight more carefully, I substitute freeze-dried hash browns for the fresh potatoes, which drops the weight to about 0.8 pounds but sacrifices some of the texture. Trade-offs are part of camping cooking, and I have made peace with that.
Pancakes That Actually Work at Camp
I have a confession: I used to hate making pancakes while camping. For years, I could not figure out why my camp pancakes were always either burnt on the bottom and raw in the middle, or so pale and dense they had the texture of hockey pucks. I blamed my stove. I blamed the pan. I blamed the elevation. What I did not blame was my complete lack of temperature control skills, which was actually the problem.
The turning point came during a camping trip in Washington’s North Cascades with my photographer friend Jake. He is notoriously impatient about breakfast because he wants to catch the morning light, so he had been lobbying for us to skip cooking entirely and just eat granola bars. I was determined to prove that I could make proper pancakes in under fifteen minutes, and I failed so spectacularly that he took photos of the charred remains. Those photos still haunt me.
After that humiliation, I spent three months testing pancake methods at home, then another six months testing them in various camping conditions. I tracked everything in my camping food journal: batter consistency, stove temperature, flip timing, altitude, ambient temperature, humidity. By the end, I had data on 47 different pancake attempts, and I finally understood what I had been doing wrong.
The first problem was batter consistency. Traditional pancake recipes assume you are working with a consistent heat source and a flat cooking surface. Camp stoves are neither. They produce uneven heat with hot spots, and unless you are car camping with a perfectly level site, your pan is probably tilted slightly. This means your batter needs to be thicker than typical pancake batter so it does not all flow to one side of the pan. I aim for a consistency where the batter mounds slightly when dropped from a spoon rather than immediately spreading flat.
The second problem was temperature control. Most camp stoves have two settings: off and inferno. Finding that medium-low sweet spot for pancakes requires constant adjustment, and even then, you are going to get more variation than you would at home. I learned to accept slight imperfection and to flip pancakes based on visual cues rather than strict timing. When the bubbles that form on the surface start to pop and stay open rather than filling back in, that is when you flip. This happens at different speeds depending on your heat level, the thickness of your batter, and the altitude.
My go-to camping pancake recipe starts with a pre-mixed dry base that I prepare at home. I combine two cups of all-purpose flour, three tablespoons of sugar, two teaspoons of baking powder, one teaspoon of baking soda, and three-quarters of a teaspoon of salt. I store this mix in a quart-sized freezer bag with the air pressed out. At camp, I add one egg and about one cup of whatever liquid I have available. Milk is ideal, but I have made these successfully with reconstituted powdered milk, water mixed with a splash of coffee, and once, in desperation, with leftover coconut milk from the previous night’s curry. That last version was surprisingly good, actually, with a subtle sweetness that worked well with maple syrup.
The technique that transformed my camp pancakes is what I call the preheat test. Before I pour any batter, I heat my pan over medium-low for a full five minutes. Then I flick a tiny drop of water onto the surface. If it sizzles and evaporates within three seconds, the pan is too hot. If it just sits there, the pan is too cold. The sweet spot is when the water droplet dances around for about four seconds before evaporating. Once I hit that point, I reduce the heat slightly and start cooking.
I use about three tablespoons of batter per pancake, which gives me roughly four-inch pancakes that cook through evenly. I wait for those bubbles to form and pop, usually about two minutes, then flip. The second side only needs about ninety seconds. I keep finished pancakes warm by stacking them on a plate that I set near, but not directly on, my stove.
For variations, I have tested dozens of add-ins over the years. Blueberries are the classic choice, but I have learned to fold them in gently at the last second rather than mixing them into the batter because they release moisture that can make the pancakes gummy if given time to sit. Chocolate chips work well if you scatter them on top of the batter immediately after pouring rather than mixing them in, so they end up embedded in the top surface and get slightly melty when you flip. Sliced bananas are best added after cooking as a topping because they turn to mush if you try to cook them into the pancake.
My personal favorite variation is what I call the camping special: I add a quarter cup of rolled oats to the dry mix, which gives the pancakes more substance and staying power. On a day when you are going to hike ten miles, you want a breakfast that will fuel you past noon, and the oats add fiber and slow-release energy. I first made this version during a five-day trip in the Wind River Range after my friend Sarah, who is vegetarian and watches her protein intake carefully, pointed out that my standard pancakes were basically just simple carbohydrates. She was right. The oat version has become my default for any trip involving significant physical activity.
For toppings, I bring real maple syrup in a small leak-proof container because the fake stuff tastes even worse when you are outdoors and your palate is heightened from fresh air and exertion. I have experimented with various nut butters, fresh fruit, honey, and even savory toppings like bacon crumbles and a drizzle of hot sauce. That last combination sounds strange, but try it once before you judge. Jake, who was skeptical, has since requested the bacon and hot sauce pancakes multiple times.
The complete pancake setup for two people weighs about 1.1 pounds including syrup, and the active cooking time is about fifteen minutes once your pan is heated. I can usually get eight pancakes from one batch of batter, which is four per person and plenty for a morning of moderate activity.
The Breakfast Burrito System
I call this a system rather than a recipe because I have refined it to the point where it is almost foolproof, even for people who claim they cannot cook. My partner Marcus made these successfully on his own during a solo trip last fall, and he called me afterward specifically to express surprise that he had not ruined them. That is a high compliment from someone who once burned water. I am still not entirely sure how he managed that.
The burrito system came out of necessity during a group trip to Utah’s canyon country with eight people. I was responsible for breakfasts, and I needed something that could feed a crowd efficiently, pack well in a cooler, and not require individual attention for each serving. Individual scrambled egg plates were not going to work. I needed a production line.
The prep work happens entirely at home. I scramble eggs in advance, cooking them until they are just barely set, then letting them cool completely before portioning them into freezer bags. Each bag gets three scrambled eggs, which is one generous serving. I also pre-cook and crumble breakfast sausage, which I store separately. My sausage of choice is a sage-heavy variety from a local farm in Bend, but any breakfast sausage works. I cook it until it is completely done with no pink remaining, then drain off the excess fat before storing.
I make a black bean mixture by draining and rinsing two cans of black beans, mashing half of them roughly with a fork, and mixing in some cumin, garlic powder, and a pinch of cayenne. This goes into its own container. I also shred cheese at home, around two cups of a Mexican blend, and store it in a small sealed container.
The tortillas are crucial, and I learned this lesson the hard way at Arches National Park when I brought thin flour tortillas that tore every single time I tried to roll a burrito. You need the burrito-sized tortillas, the ones that are about ten inches in diameter and thicker than standard ones. I keep them in a plastic bag with a piece of wax paper between each tortilla to prevent sticking.
At camp, assembly takes about ten minutes total. I heat my skillet over medium heat and warm each tortilla for about thirty seconds per side, just until it becomes pliable. Then I spread about three tablespoons of the black bean mixture down the center, add a portion of scrambled eggs, scatter sausage crumbles on top, add cheese, and roll it up. The key to a roll that does not fall apart is folding in the sides first, then rolling from the bottom. I know this sounds basic, but I have watched dozens of people incorrectly roll burritos at camp, and the result is always a mess that spills its filling everywhere.
Once the burrito is rolled, I put it seam-side down in the hot skillet and let it toast for about ninety seconds. This creates a seal that helps keep everything inside and adds a pleasant textural contrast. I flip it and toast the other side for another ninety seconds.
For a group, I set up an assembly line: one person warms tortillas, one person adds fillings, one person rolls, and one person toasts. We fed those eight people in about twenty minutes using this system, and everyone got a hot, satisfying breakfast without anyone having to wait too long.
The variations I have tested include a vegetarian version using extra beans and sautéed peppers instead of sausage, which my friend Sarah now makes at home on weekends. I have also done a Southwest version with green chiles and cotija cheese, and a Mediterranean-inspired version with feta, sun-dried tomatoes, and spinach that I pre-wilt at home.
One thing I learned not to do is add salsa or pico de gallo before rolling. The liquid makes the tortilla soggy and prone to tearing. Bring salsa separately as a topping to add after the burrito is assembled and toasted.
The burrito filling components for two people weigh about 1.6 pounds total, plus the tortillas. It is not the lightest breakfast option, so I save this for car camping trips or the first morning of a backpacking trip when the cooler is still fully stocked.
Quick Oats Done Right
I know oatmeal has a bad reputation as boring camping food, and honestly, I contributed to that reputation with my own failures. The Great Oatmeal Incident of 2018 on the Olympic Peninsula is still discussed among my regular camping crew. I made oatmeal so bland, so gluey, so thoroughly unappetizing that our entire group of six people refused to eat breakfast. We hit the trail hungry that day, and I heard about it for miles.
The problem with most camp oatmeal is that people treat it as an afterthought. They boil water, pour in instant oats, and expect something edible. But oatmeal responds incredibly well to a little forethought and creativity, and it can be a genuinely delicious, nutritious breakfast that takes less than five minutes to prepare.
My upgraded oatmeal starts with old-fashioned rolled oats, not instant. Instant oats turn to paste; rolled oats retain some texture and have a more satisfying chew. I portion out half a cup of oats per person into a small container or bag. I add two tablespoons of brown sugar, a quarter teaspoon of cinnamon, a pinch of salt, and two tablespoons of dried fruit. My go-to dried fruit is a mix of chopped apricots and cranberries, but raisins, cherries, or freeze-dried berries all work.
At camp, I bring about three-quarters of a cup of water per serving to a boil, then remove the pot from the heat and stir in the oat mixture. I put the lid on and let it sit for two minutes. That resting time is when the magic happens. The oats absorb the water gradually and develop a creamy consistency without becoming gluey.
The topping is where this oatmeal goes from acceptable to actually good. I bring small packets of nut butter, usually almond butter, and a tiny bottle of maple syrup. I drizzle both on top, add a handful of whatever nuts I have packed for snacks, usually walnuts or pecans, and sometimes finish with a few more dried berries. The combination of creamy oats, rich nut butter, sweet maple, and crunchy nuts hits multiple textures and flavors in each bite.
I have tested this at elevations from sea level to over 12,000 feet, and the only adjustment needed at high altitude is using slightly less water because it evaporates faster during the resting period. At my usual Oregon elevations around 5,000 to 8,000 feet, the recipe works exactly as written.
The entire oatmeal setup for two people weighs about 0.6 pounds, making it my lightest breakfast option and the one I default to when I am counting ounces on a longer backpacking trip. The calorie-to-weight ratio is excellent, roughly 400 calories per serving at that weight, and the combination of complex carbohydrates, protein from the nut butter, and fat keeps me satisfied for four or five hours of hiking.
The French Toast Recovery Story
Remember that windswept Canyonlands breakfast disaster I mentioned at the beginning? The one that taught me more than any successful meal ever could? Let me tell you how that turned into what is now my most requested camping breakfast.
The problems that morning were numerous. I was trying to make French toast the same way I make it at home: dipping bread directly into a bowl of egg mixture and cooking immediately. But my cooler had been sitting in the desert sun for two days, and the bread was stiff and resistant to absorbing the egg. My stove kept dying in the gusts that swept through our campsite. And I was trying to cook on a pan that was way too hot because I was impatient and cold and wanted this to be over.
The result was French toast that was soggy in some spots, burnt in others, and had the overall appeal of flavored cardboard. I ate mine out of stubborn pride, but everyone else diplomatically opted for granola bars.
Over the next two years, I completely rebuilt my French toast method with those failures in mind. The version I make now accounts for variable bread freshness, desert wind conditions, and the general chaos of camp cooking.
The first change was the bread. I stopped bringing regular sliced bread and started bringing brioche or challah, which are sturdier and have enough fat content that they do not turn to mush when soaked. I also started slicing it thicker, about three-quarters of an inch, and leaving the slices out uncovered for a few hours before the trip so they dry out slightly. Slightly stale bread absorbs the egg mixture more evenly without falling apart.
The second change was the soaking method. Instead of dipping bread in the egg mixture at the moment of cooking, I now soak the bread at home, the night before we leave or the morning of. I place the slices in a shallow container, pour the egg mixture over them, cover it, and let them sit in the refrigerator for at least four hours and up to overnight. The bread becomes uniformly saturated, almost like bread pudding, and cooks much more evenly.
My egg mixture is three eggs, a quarter cup of milk, one tablespoon of sugar, half a teaspoon of vanilla extract, and a quarter teaspoon of cinnamon. This coats about six thick slices of bread.
At camp, I heat my cast iron skillet with about a tablespoon of butter over medium heat. The key is letting the butter foam and then subside before adding the bread. When the foam dies down, the butter is hot enough to cook the French toast but not so hot that it burns. I cook each slice for about three minutes per side, checking frequently for color. You want a deep golden brown, almost caramelized exterior.
The pre-soaking method means the French toast cooks through more reliably because the egg has already penetrated to the center. At home, when you dip and immediately cook, you often get a thick layer of cooked egg on the outside and dry bread in the middle. Pre-soaking eliminates that problem entirely.
For toppings, I bring maple syrup in my reliable leak-proof container and often pack fresh berries if it is early in a trip when the cooler is still cold enough to keep them from getting mushy. Powdered sugar in a small shaker is a nice touch for car camping trips, though I do not bother with it when I am carrying everything on my back.
This French toast serves two people and packs to about 1.3 pounds including toppings. The active cooking time is about twelve minutes, assuming your pan is already heated.
I have now made this recipe successfully in the very canyon where I originally failed so miserably. On a return trip to Canyonlands two years after the disaster, I made it for the same group of friends, and when everyone went back for seconds, I felt like I had finally redeemed myself. Marcus said it was the best French toast he had ever had outdoors, which is the kind of specific, qualified compliment he specializes in.
My Testing Process
People sometimes ask how I can be confident that a recipe will work for them when camping conditions vary so much. The answer is obsessive testing over many years and many trips. For each recipe in this article, I have documented my tests in a journal that I have kept since 2016. Here is what that process looks like.
Every recipe gets tested a minimum of five times before I consider it ready to share. The first test is always at home, in my kitchen, with full access to all my regular equipment. This tells me if the base recipe works at all. The second test is at a local campsite about forty-five minutes from my house in Bend, where conditions are controlled but I am cooking on my camp stove and camp equipment. The third test is on an actual camping trip, where I am tired from a night on the ground, the weather is uncontrolled, and I am actually hungry.
After those initial tests, I start varying conditions deliberately. I have tested most of these recipes at multiple elevations, from sea level to above 10,000 feet. I test in different temperatures, from early spring trips where the morning air is in the thirties to summer trips where it is already seventy degrees by 7 AM. I test with different equipment: my primary MSR WhisperLite, my backup Jetboil, and occasionally on an actual campfire.
I track specific metrics for each test: prep time, cook time, fuel consumption if I can measure it, taste ratings from whoever is eating, and any issues that came up. I also note the specific conditions like elevation, temperature, wind, and what kind of cooking surface I used.
This might sound excessive, and honestly, it probably is. But the result is that when I tell you a recipe takes twelve minutes to cook, I am not guessing. I have actually cooked it twelve times and taken the average. When I say it works at high altitude with a minor adjustment, I have literally made it at high altitude and documented what that adjustment needs to be.
My camping partners have become accustomed to being test subjects. Marcus has eaten more experimental camping breakfasts than any reasonable person should have to. Jake has learned that when I say I am testing something new, there is about a thirty percent chance it will not turn out well, but he is willing to take those odds for the other seventy percent. Sarah, who has been camping with me since college, has seen my worst failures and still agrees to try my new recipes, which I consider a significant vote of confidence.
What I Have Learned About Morning Meals
After seventeen years of camping and twelve years of writing about outdoor cooking, I have come to believe that breakfast might be the most important meal to get right in the wilderness. Dinner is forgiving because you are settling in for the evening anyway. Lunch is often just snacks eaten on the trail. But breakfast sets the tone for your entire day. A good camp breakfast gives you energy, lifts your mood, and makes the whole trip feel more civilized. A bad one leaves you cranky, hungry, and questioning your life choices.
The recipes I have shared represent what I consider the essential camping breakfast repertoire. The hash is hearty and adaptable. The pancakes are a crowd-pleaser that works for kids and adults alike. The burritos are efficient for groups. The oatmeal is lightweight and fast. The French toast is for those mornings when you want to feel like you are eating at a nice brunch spot instead of crouching next to a campfire.
But beyond specific recipes, I want to share the principles that have guided my approach to camp cooking.
First, do as much prep as possible at home. Your future self, the one who is tired and cold and does not want to spend thirty minutes cooking, will thank you. Chopping vegetables, pre-cooking proteins, mixing dry ingredients, even assembling complete meals that just need reheating: all of this saves time and reduces the chance of something going wrong.
Second, accept that camp cooking will never be as precise as home cooking. Your heat source is less controllable. Your equipment is more limited. Conditions vary wildly. Build in buffers and do not expect perfection. Aim for delicious and achievable rather than Instagram-worthy.
Third, test recipes before you rely on them. I am not saying you need to test everything five times like I do, but at least make a new recipe once at home before you bring it into the backcountry. There is nothing worse than discovering a recipe does not work when you are miles from anywhere with no backup plan.
Fourth, pay attention to weight and volume if you are backpacking. The best recipe in the world is not worth much if it adds two pounds to your pack or requires equipment you cannot carry. I always calculate the calorie-to-weight ratio and the serving-to-volume ratio for any recipe I might take on a trip where I am carrying everything.
Fifth, and this is something I wish I had understood earlier in my camping career, feed yourself well. You are out there in nature doing something wonderful for your body and mind. You deserve real food that nourishes you and brings you joy, not just the bare minimum calories to keep moving. Take the time to make breakfast something you look forward to, not just something you endure.
I am still refining these recipes. Right now, I am working on a shakshuka variation that I think will be fantastic but that I have not quite perfected yet. The tomato sauce keeps scorching on my camp stove, and I am experimenting with different heat management techniques. I am also developing a savory Dutch baby that I have made successfully at home but have not yet tested in the field. By next summer, I hope to have both of those ready to add to my rotation.
Camping breakfast does not have to be boring. It does not have to be a chore. With some preparation, the right recipes, and a willingness to learn from your failures, and trust me, you will have failures, you can eat better in the wilderness than a lot of people eat at home.
That sunrise breakfast at Three Sisters, the one where everything finally came together after years of mediocre camping meals, still stands out as one of my happiest food memories. The hash was perfect. The coffee, made with my portable pour-over setup because I refuse to compromise on coffee, was excellent. Luna was behaved for once and did not try to steal food from our plates. Marcus and I sat on a log overlooking a meadow still silver with frost, eating breakfast and watching the light change on the mountains, and I remember thinking that this was exactly what camping should feel like.
That feeling is available to you too. It just takes some practice, some planning, and a willingness to burn a few batches of pancakes along the way. I have burned plenty, and I will probably burn more. But every failure teaches something, and eventually, those lessons add up to mornings like the one at Three Sisters.
Your first attempt at any of these recipes might not be perfect. That is completely normal. My first attempts were rarely perfect either. What matters is that you try, you learn, and you keep at it until breakfast becomes something you genuinely enjoy rather than just tolerate. The wilderness deserves better than granola bars and regret. So do you.
Frequently Asked Questions
Over the years, I have received hundreds of questions about camping breakfast cooking through my website, at trail meetups, and from friends of friends who heard I am “the camping food person.” These are the questions that come up most often, along with the honest answers I have learned through my own trial and error.
What is the best camp stove for cooking breakfast?
I have been using my MSR WhisperLite for eleven years now, and it refuses to die. For breakfast cooking specifically, I prefer liquid fuel stoves over canister stoves because they offer better simmer control, which matters when you are trying not to burn pancakes or scorch eggs. That said, my backup Jetboil works fine for quick meals like oatmeal where you just need to boil water. If you are primarily car camping and have space, a two-burner propane stove gives you the most home-like cooking experience. I tested a Coleman Classic during a family trip last summer, and the temperature control was noticeably better than any backpacking stove I own. For backpacking, stick with whatever reliable stove you already have and learn its quirks rather than buying something new right before a trip.
How do I keep eggs from breaking during transport?
I cracked my first three dozen camping eggs before I figured this out. For car camping, I use a hard-sided egg carrier that holds twelve eggs. It cost about eight dollars and has paid for itself many times over. For backpacking, I have two approaches. First, I pre-scramble eggs at home and transport them in a leak-proof container or doubled freezer bags. They stay good in a cooler for about three days. Second, if I want whole eggs, I crack them into a Nalgene bottle before the trip. Two eggs fit perfectly in a small-mouth bottle, and the rigid sides protect them completely. Just remember to label it clearly so nobody tries to drink your eggs. Marcus made that mistake once, and I still hear about it.
Can I make these recipes over a campfire instead of a stove?
Yes, but with significant adjustments. Campfire cooking requires a good bed of coals rather than active flames, which means you need to start your fire at least thirty to forty-five minutes before you want to cook. I use a steel grate balanced on rocks to create a stable cooking surface about six inches above the coals. The hash and French toast work beautifully over a fire because they benefit from the smoky flavor. Pancakes are trickier because campfire heat is so uneven, but I have made them work by rotating my pan constantly. Oatmeal is actually easier over a fire because you just need to boil water. My advice is to practice campfire cooking at home in a fire pit before you rely on it in the backcountry. I ruined many meals before I got comfortable with fire-based heat management.
How long will pre-cooked breakfast ingredients last in a cooler?
This depends heavily on your cooler quality and how well you manage ice. In my Yeti Tundra 45 with block ice, pre-cooked bacon stays good for four to five days. Scrambled eggs last about three days before the texture gets questionable. Par-cooked potatoes are fine for three to four days. The key is keeping your cooler below 40 degrees Fahrenheit, which I verify with a cheap thermometer I keep inside. I also freeze all my pre-cooked ingredients solid before packing, which helps them act as additional ice packs. On trips longer than four days, I plan to eat the most perishable items first and save shelf-stable options like oatmeal for the end.
What is the easiest camping breakfast for beginners?
Start with the upgraded oatmeal. It requires only boiling water, takes less than five minutes, and is almost impossible to mess up. Once you are comfortable with that, try the breakfast burritos with pre-made fillings. The actual camp cooking is just warming tortillas and assembling, which builds confidence without much risk. I would save the hash and pancakes for after you have a few camping meals under your belt and understand how your stove behaves. My friend’s teenage daughter learned to camp cook using this progression, and by her third trip she was making French toast like a pro.
How do I adjust recipes for high altitude camping?
Water boils at lower temperatures as elevation increases, which affects cooking times for anything involving moisture or steam. At 8,000 feet, I add about twenty percent more time to most recipes. At 10,000 feet and above, that becomes thirty to forty percent. The hash eggs need an extra ninety seconds to two minutes of steaming. Pancakes take slightly longer to cook through. Oatmeal might need an extra minute of resting time or a splash more water. The biggest adjustment is for boiling water itself. At 10,000 feet, my water takes almost twice as long to boil, which means more fuel consumption. I always bring an extra fuel canister on high altitude trips to account for this.